
![]() In Illustrator you have to use the same range of actions repeatedly. To make working with Illustrator faster and easier, we automated action ranges for you. You can carry out this actions range by pressing a function key on your keyboard.
In Illustrator you have to use the same range of actions repeatedly. To make working with Illustrator faster and easier, we automated action ranges for you. You can carry out this actions range by pressing a function key on your keyboard.
On this page we teach you how to use these function keys.
You need to have the DS Actions.aia file installed inside Illustrator. At the bottom of this page you find a link to the page how install the DS Actions Function Keys.
F2: Clone / duplicate (copy and paste back on the same place).
F3: Hide unselected objects.
F4: Show all hidden objects (and deselect).
F6: Delete unused panel Items (clean up).
F7: Lock others (all unselected objects).
F8: Unlock all (and deselect).
F9: Rasterize any selected object or image to an 150 ppi image.
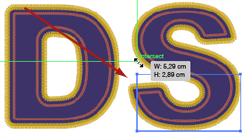
F10: Reflect.
There is a standard method to reflect. Unfortunately in some cases, on Windows computers, Illustrator freezes when the 'Reflect' panel appears. In that case use this way to reflect.

This video takes 5 minutes.
_________________________________________________________________
This tool copies the selection, pastes it back on the same location and brings it to front.

![]()
Step 1: Click on the yellow Ai icon above to download and open the Illustrator document.
Step 2: Activate the 'Direct Selection Tool' (a).
Always 'Deselect' (ctrl-shift-a) before using the Direct Selection  (a) Tool or Group Selection Tool (q)
  .
.
Step 3: Click on the armhole path to select that part of the path.

Step 4: Press the F2 key to clone the path and use the > key on your keyboard to move it to the right.
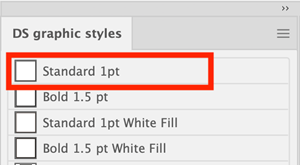 Step 5: With the copied path selected, go to the 'ds-graphic-styles' panel and click on 'Standard 1pt'.
This will reset the path fill color, stroke color and stroke width settings to: black stroke, no fill and 1 pt width.
 Step 6: Go to the 'ds-brushes' panel and click on the brush called 'Single Stitch'. Or any other stitch you wish.

When you select some art and press the F3 key, all other objects will become invisible and uneditable.
![]()
Step 1: Click on the yellow Ai icon above to download and open the Illustrator document.
 Step 2: Select the art you want to focus on.
 Step 3: Press the F3 key and all other stuff will be hidden and uneditable.
Objects that are locked will not hide!
To bring back all hidden objects, press the F4 key.
Unlike the official Illustrator 'Show All' function, this F4 action key also deselects all objects after unhiding them.
![]()
When you press the F6 key, all unused objects in panels will be deleted. Like Swatches, Brushes etc. It will also delete useless anchor points called 'Stray Points'. Confirm all pop-up screens and your document is cleaned up. This is very usefull when you recycle old drawings and there are still a lot of pattern swatches inside or when you think a file is to heavy, this might help as well.
This clean up tool will not remove any swatch, brush, path etc. which is used in the drawing.
Step 1: Click on the yellow Ai icon above to download and open the Illustrator document.
Step 2: The document is shown in 'Outline mode'. This means it does not show the colors and effects, only the paths. Press the 'F6' key on you keyboard.
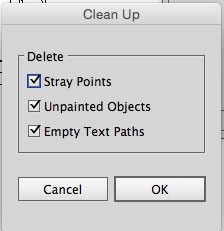 Step 3: Confirm any question Illustrator asks (Press 'OK' or 'Continue').
Seen in Outline modus (ctrl-y).


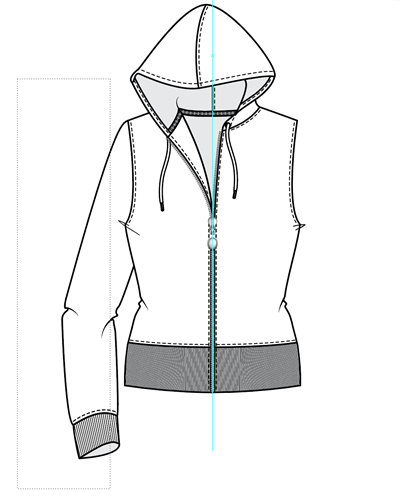
When you select art and press the F7 key, all other objects will be locked.
![]()
Step 1: Click on the yellow Ai icon above to download and open the Illustrator document.
Step 2: Select the grouped artwork.
Step 3: Press the 'F7' key. All not selected objects will lock. Try to select any other object, it won't work :-).
Press the 'F8' key to unlock all locked items. After that it will deselect all the unlocked items.
![]()
Imagine that you have an artwork with thousands of anchor points. Your computer need a lot of work to draw the artwork on your screen each time you move, zoom your artboard. Then, you are going to duplicate the artwork, scale it down and place it on your style drawing. This style drawing will be duplicated on you artboard a few times as well. The artwork is now duplicated many times in your stylesheet, slowing down the performance of your computer heavily. Also, your document becomes to much mb's.
All of this can be a reason to keep one version of the artwork in your stylesheet actual vectors (the large version, with explanation for the manufacturer). Then it would be a good idea if the duplicates would only be a small image (rasterized version). When you rasterize all the duplicates, the computer performance when you work in this stylesheet will be much faster! Also, your Illustrator file, AND the PDF you need to send to the manufacturer will be much less MB's!
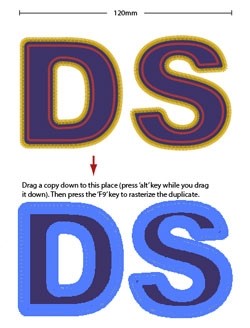
For this reason we created an automated funktion key (F9) to rasterize the selected artwork to 150 dpi resolution pixeled image.
Step 1: Click on the yellow Ai icon above to download and open the Illustrator document.
Step 2: Select the large artwork.
Step 3: Drag the artwork down, while you drag, press and hold the 'alt' key. First release the mouse button, the the 'alt' key.
You just duplicated the artwork.
 Step 4: With the duplicated artwork still selected, press the F9 key on your keyboard.
This artwork is now a pixel image (rasterized).
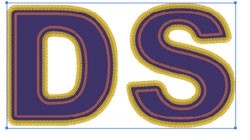
 Step 5: Scale this rasterized image down.
Step 6: Drag the artwork on top of the styledrawing. 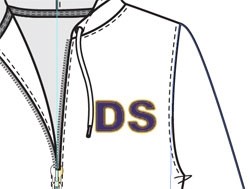
This way you don't have such a complicated artwork on your garment drawing, but a simple image.
When artworks are very complex, this tric will keep your computer much, much faster! And your Illustrator / PDF files will stay small.
The method how to reflect below is not the default method. The Designersupport tutorials show a different method that is the default Illustrator method. The reason this 'F10' Reflect action is available is because in some cases on Windows computers, (even new computers) Illustrator freezes when the 'Reflect' panel should appear. Using this action 'F10', the Reflect panel will not appear so Illustrator will never freeze. It's also slightly faster to reflect.
![]()
Step 1: Click on the yellow Ai icon above to download and open the Illustrator document.
 Step 2: Activate the 'Selection Tool' (v)
  and drag a 'mark' over all sleeve objects to select the sleeve.
Step 3: Activate the 'Reflect Tool' (o)  .
.
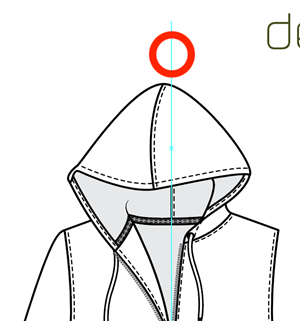 Step 4: Above the drawing, click once on the center guide.
Try not to move the mouse when you click.
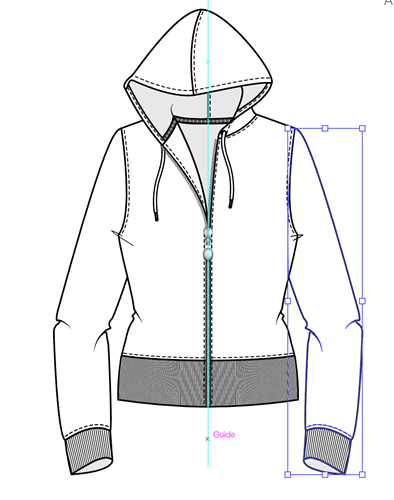 Step 5: Press the 'F10' key to reflect.
You can find the download and installation instructions at the bottom at this page at 'DS Libraries and Tools INDEX'.
----------------------------------------------------
![]() In Illustrator gebruik je dagelijks regelmatig dezelfde handelingen. Om het werken met Illustrator sneller en makkelijker te maken, hebben wij deze handelingen voor jou geautomatiseerd. Zo kan je nu een reeks handelingen eenvoudig uitvoeren met een druk op een functietoets op je toetsenbord.
In Illustrator gebruik je dagelijks regelmatig dezelfde handelingen. Om het werken met Illustrator sneller en makkelijker te maken, hebben wij deze handelingen voor jou geautomatiseerd. Zo kan je nu een reeks handelingen eenvoudig uitvoeren met een druk op een functietoets op je toetsenbord.
Op deze pagina leren wij je hoe je deze functietoetsen gebruikt.
Je dient het DS Actions.aia document geinstalleerd te hebben in Illustrator. Onderaan deze pagina staat de link hoe je de 'DS Actions' functietoetsen installeert.
F2: Klonen / dupliceren (kopiëren en op dezelfde plek terugplakken).
Er gebeuren eigenlijk vijf handelingen met als resultaat dat als je iets kopieert dat in een groep zit, dat dit wordt terug geplakt buiten de groep.
F3: Verberg alle objecten die niet geselecteerd en niet vergrendeld zijn.
F4: Alle verborgen objecten zichtbaar maken (en deselecteren daarna).
F6: Opschonen.
F7: Vergrendel objecten die niet geselecteerd zijn.
F8: Ontgrendel alles (en deselecteer daarna).
F9: Raster elk object en of plaatje naar 150 DPI plaatje.
F10: Spiegelen.
Hier is een standaard methode voor. Echter, in sommige gevallen op Windows computers, wanneer het venster 'Spiegelen' op moet komen bevriest Windows. Als jouw computer daar last van heeft, dan kan je deze knop gebruiken om te spiegelen.
Deze video duurt 5 minuten.
_________________________________________________________________
Deze tool kopieert de selectie, plakt het op dezelfde locatie en brengt het naar de voorgrond.
![]()
Stap 1: Klik op het gele Ai icoon hierboven om het Illustrator document te downloaden en te openen.
Stap 2: Activeer het gereedschap 'Direct Selecteren' (a).
Altijd 'Deselecteren' (ctrl-shift-a) voor het gebruik van het gereedschap Direct Selecteren (a) of het gereedschap Groep Selecteren (q) .
Stap 3: Klik op het armgat om dat deel van het pad te selecteren.
Stap 4: Druk op de F2 toets om het pad te kloonen en gebruik de > toets op je toetsenbord om het naar rechts te schuiven.
Stap 5: Nu het gekopieerde pad geselecteerd is, ga naar het 'ds-graphic-styles' deelvenster en klik op 'Standard 1pt'.
Deze actie zal de vullingkleur, lijnkleur en lijndikte zetten op: zwarte lijn, geen vulling en 1 pt dikte.
Stap 6: Ga naar het deelvenster 'ds-brushes' en klik op de penseel genaamd 'Single Stitch'. Of probeer elk stiksel je wenst.
Wanneer je een object selecteert en op de F3 toets drukt, worden alle andere objecten onzichtbaar en kunnen dan niet aangepast worden.
![]()
Stap 1: Klik op het gele Ai icoon hierboven om het Illustrator document te downloaden en openen.
Stap 2: Selecteer het object waar je op wilt focussen.
Stap 3: Druk op de F3 toets de rest van de tekening wordt onzichtbaar en kan je nu niet (per ongeluk) aanpassen.
Vergrendelde objecten worden niet onzichtbaar!
Om alle verborgen objecten weer zichtbaar te maken, druk op de F4 toets.
In tegenstelling tot de officiele Illustrator functie 'Show All', deze F4 toets zal alle objecten ook deselecteren na het zichtbaar maken.
![]()
Wanneer je op de F6 toets drukt, worden alle ongebruikte items in de deelvensters verwijderd. Zoals Stalen, Penselen etc. Het zal ook nutteloze ankerpunten en tekstpunten verwijderen. Bevestig alle pop-up schermen en jouw document is opgeschoond. Dit is zeer nuttig wanneer je oude tekeningen wilt hergebruiken waar nog veel patroonstalen in zitten of wanneer je denkt dat het document te groot is, kan dit ook helpen.
Deze opschoning zal geen stalen, penselen, paden etc. verwijderen of beinvloeden die in de tekening gebruikt worden.
Stap 1: Klik op het gele Ai icoon hierboven op het Illustrator document te downloaden en openen.
Stap 2: Het document wordt getoond in 'Outline modus'. Dit betekent dat kleuren en effecten niet zichtbaar zijn, alleen de paden. Druk op de 'F6' toets op je toetsenbord.
Stap 3: Bevestig elke vraag die Illustrator stelt. (Druk op 'OK' of 'Volgende').
Hier weergegeven in de modus 'Omtrek' (ctrl-y).
Wanneer je artwork selecteert en op de F7 toets drukt, worden alle andere objecten vergrendeld.
![]()
Stap 1: Klik over het bovenstaande gele Ai icoon om het Illustrator document te downloaden en openen.
Stap 2: Selecteer het gegroepeerde artwork.
Stap 3: Druk op de 'F7' toets. Alle niet-geselecteerde objecten worden vergrendeld. Probeer maar eens een ander object te selecteren... werkt niet ;-).
Druk op de 'F8' toets om alle vergrendelde objecten te ontgrendelen. Daarna zal het alle ontgrendelde objecten deselecteren (wat normaal gesproken niet automatisch gebeurd)
![]()
Stel je voor dat je een artwork hebt met duizenden ankerpunten. Het kost je computer veel rekenwerk om het artwork op je scherm zichtbaar te maken elke keer dat je verschuift of inzoomt op je tekengebied. Dan ga je het artwork dupliceren, schalen en plaatst het op je stijltekening. Deze stijltekening wordt ook een aantal keer gedupliceerd op je tekengebied. Het artwork is nu meerdere malen gedupliceerd in je stijltekening, dit vertraagd je computer enorm. Plus, je document wordt te groot (te veel mb's).
Dit kan een reden zijn om één originele versie van het artwork in je vector stijltekening te houden (de grote versie, met uitleg voor de fabrikant). Dan is het een goed idee om daarnaast de kopieën in een kleiner plaatje (gerasterde versie) te houden. Wanneer je alle kopieën rastert, blijft de snelheid van je computer in deze stijltekening goed. Je Illustrator document EN de PDF die je naar de fabrikant gaat sturen zal veel minder groot zijn (minder mb's)!
Om deze reden hebben wij deze geautomatiseerde functietoets (F9) gemaakt, om geselecteerd artwork te rasteren naar een 150 dpi resolutie pixel plaatje.
Stap 1: Klik op het bovenstaande gele Ai icoon om het Illustrator document te downloaden en openen.
Stap 2: Selecteer het grote artwork.
Stap 3: Sleep het artwork naar beneden, terwijl je sleept, druk op de 'alt' toets en houdt deze vast. Laat eerst de muistoets los, daarna de 'alt' toets.
Nu het je het artwork gekopieerd (gedupliceerd).
Stap 4: Terwijl het gekopieerde artwork nog geselecteerd is, druk op de F9 toets op je toetsenbord.
Dit artwork u nu een pixel plaatje (gerasterd).
Stap 5: Verklein het gerasterde plaatje (kleiner schalen).
Stap 6: Sleep het artwork bovenop je stijltekening.
Op deze manier heb je geen complex artwork meer in je stijltekening, maar een simpel plaatje.
Wanneer artworks complex zijn, met deze truc behoud je computer zijn snelheid. Plus je Illustrator / PDF documenten blijven klein. Het nadeel is dat je het artwork niet opnieuw kan inkleuren. Het is zeg maar een 'wegwerp' artwork geworden.
De manier om te spiegelen die wij hier tonen is niet de standaard manier die in alle tutorials wordt getoond. De reden dat deze F10 methode door ons wordt aangeboden is omdat het in sommige gevallen op Windows computers voor komt (zelfs nieuwe computers) dat Illustrator vastloopt op het moment dat het venster 'Spiegelen' tevoorschijn hoort te komen. In dat geval heb je met deze F10 methode een alternatief want met deze methode wordt het venster 'Spiegelen' niet gebruikt. Het is overigens ook een ietsjes snellere manier om te spiegelen.
![]()
Stap 1: Klik op het gele 'Ai' icoontje om het oefen document te downloaden en open het in Illustrator.
Stap 2: Activeer het gereedschap 'Selecteren' (v) en trek een kader over alle onderdelen van de mouw. Zodat je de hele mouw hebt geselecteerd.
Stap 3: Activeer het gereedschap 'Spiegelen' (o) .
Stap 4: Klik boven de tekening eenmaal op de midden hulplijn.
Probeer de muis niet te bewegen wanneer je klikt.
Stap 5: Druk op de 'F10' toets om te spiegelen.
De download en installatie instructies kan je vinden door hier onder op 'DS Libraries and Tools INDEX' te klikken.